Projects made with a 3D FDM Printer.

These our projects that were made with our Tevo Michelangelo 3d Printer.
These prints were crafted using a Tevo Michelangelo 3D printer, a compact and user-friendly machine that employs Cura slicing software for precise model processing. Instead of the traditional method of transferring gcode files to an SD card, OctoPi—integrated with OctoPrint software—allows for the model code to be wirelessly transmitted to the printer. This seamless connection enhances convenience and efficiency.
Moreover, OctoPi provides robust monitoring capabilities. With an attached camera, you can remotely observe the printing progress in real-time. The open-source software is accessed through a webpage, offering extensive functionality not only to monitor the printing process but also to control various printer functions. A notable feature is the time-lapse option, which creates engaging videos showcasing the model’s transformation from start to finish.
For those on the go, print progress can also be monitored on Android devices using apps like OctoRemote or Printoid, available on the Google Play Store. These apps bring the power of remote monitoring and control to your fingertips, making 3D printing more accessible and interactive than ever before.
We have a Logitech C270 HD cam connected to the Raspberry Pi's OctoPi. I'm using Blender to design any projects that I can't find online. Been using 3D Solutech 1.75mm filament, either in white or black. Also using a GeckoTek EZ-Stik Cold Professional 3D Printer Build Surface instead of using painters tape on the bed, and really am happy with it.
9/1/2018
Raspberry Pi case for OctoPrint.
9/1/2018
2.5 inch to 3.5 HDD SDD Adapter.
9/6/2018
Raspberry Pi Zero W Case.
9/8/2018
Astron Power Supply Covers.
9/16/2018
Coffee Measuring Spoon.
10/10/2018
Rose
10/20/2018
Baby Groot.
10.27.2018
Logitech C270 Webcam Stand.
11.4.2018
Cell Phone Stands.
11.18.2018
Desk Signs.
Our 3D Printer setup, with webcam for montioring and timelapse videos. Tevo Michelangelo Fully Assembled 3D Printer. Print size 150mm x 150mm x 150mm. Print speed of 60 mm/s. Full aluminum frame. All self contained. Logitech C270 webcam.
DIY Foot Pedal
I have a real nice Behringer V-Ampire LX210 amplifier, a modeling amp. The GNX4 is capable of recording and looping. The only thing is, you have to hit two footswitches together to bring up the recording/looping feature, then hit two foot switches again to return to the effects settings. There is a external foot switch you can get, but they are hard to find, so I just happened to come across the schematics for the foot switch, which is basically three switches, and two diodes. Also, the Behringer Amp has the ability to use a external foot switch to switch the different presets up and down. I had the case for one of those old Sling TV desktop boxes (not to be confused with the streaming app) so I thought why not build my own foot switch for both. Amazon has the switches for pedal boxes so I bought 5 of those, and the diodes.
First step, I installed the switches, three across for the GNX, then on the side two switches vertical. The three GNX switches a re Stop, Record and Play. The two Amp switches are Step Up and Step Down

Next is to wire it all up. This is the diagrams for how to wire the GNX switches. The labels are wrong, the Loop Up is Stop the LoopDn is Record and Record is actually Play, or at least that what it turned out to be.
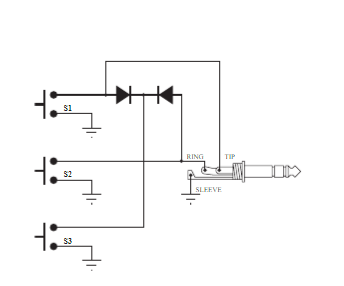

The next step, I wired a disc capacitor across each switch to stop switch bounce. Then I wired all the grounds together, keeping the GNX and the amp switches separate so there's no common ground between them.

Then I wired the switches. I didn't have any 3-conductor cable laying around, so instead I took a couple of computer power cables and chopped the ends off. It's 3-conductor cable and color coded so that should work, right? The white is the tip, wired to the first switch (looking at the back). Black is the ring and wired to the second switch. I then wired a diode to the same connector as the cable with insulation, then combined them together with a wire going to the third switch. Green is soldered to the ground bar.

Then on the amp switch side, the white is the tip, which is to step down, and black is ring and that goes to the second switch for step up.

This is it all wired. Before I closed it up I stripped a bit more of the outside cover to give a bit of movement inside, then I put a plastic washer and a zip tie so it won't pull out of the box.

And here's the finished product next to the GNX. It works great, now I have a looper pedal, all I need to do is hit the second Record switch to start the recording, and for looping I then hit the third Play switch to start the loop. The first switch will stop. If you hold down the Stop switch for about 3 seconds this allows you to delete the tracks you have recorded. On the amp switches, if you hold the Down switch for about 3 seconds, it puts the amp into the interna Chromatic Tuner mode. Hit it again to take you out of Tune mode. Pretty slick.

ElectroVoice PL76 Conversion
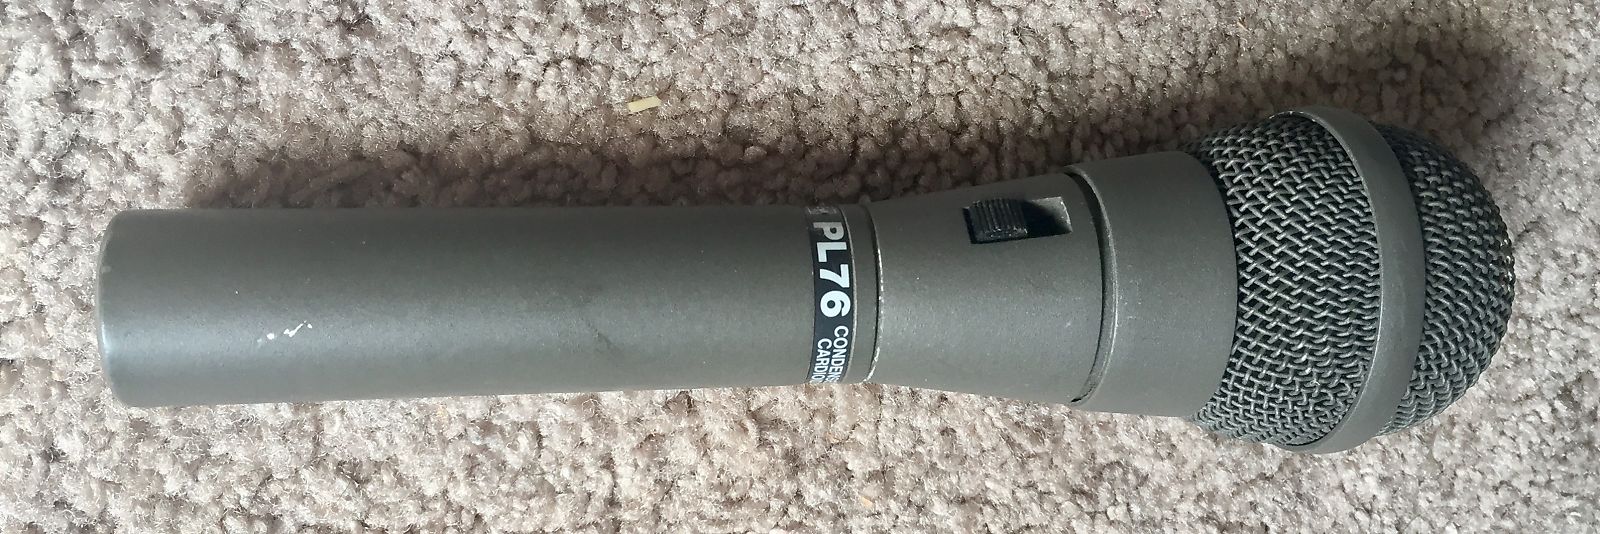
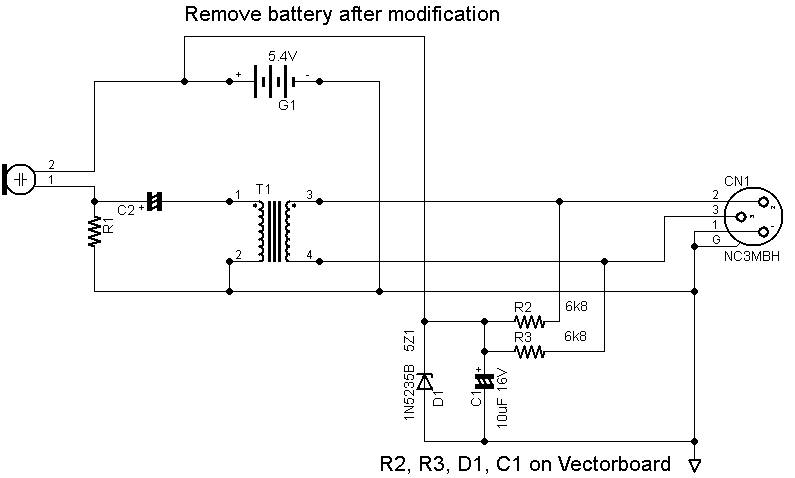
Many many years ago I had purchased a ElectroVoice PL76 Cardioid condenser microphone. Since it was a condenser microphone it needed power. Power was supplied by a 4.5 volt mercury battery. Mercury batteries have been discontinued and replacements are hard to find. There are some alkaline battery replacements, but they really don't last too long. I held on to the microphone though. Then I came across a circuit which converts the microphone to use 48 phantom power instead http://www.uneeda-audio.com/phantom/pl-76mod.htm. All that is needed is two 680K ohm resistors, one 5.1v zener diode (1N5235B), and a 10uf/15v electrolytic capacitor. I didn't use the perf board like the website, I just soldered it all together then applied heat shrink tubing and tape. It all fitted right inside the battery compartment. I found out the on/off switch didn't switch the positive lead but for some strange reason it switched the negative lead. It works great!
Ham Radio Projects
Touch Portal
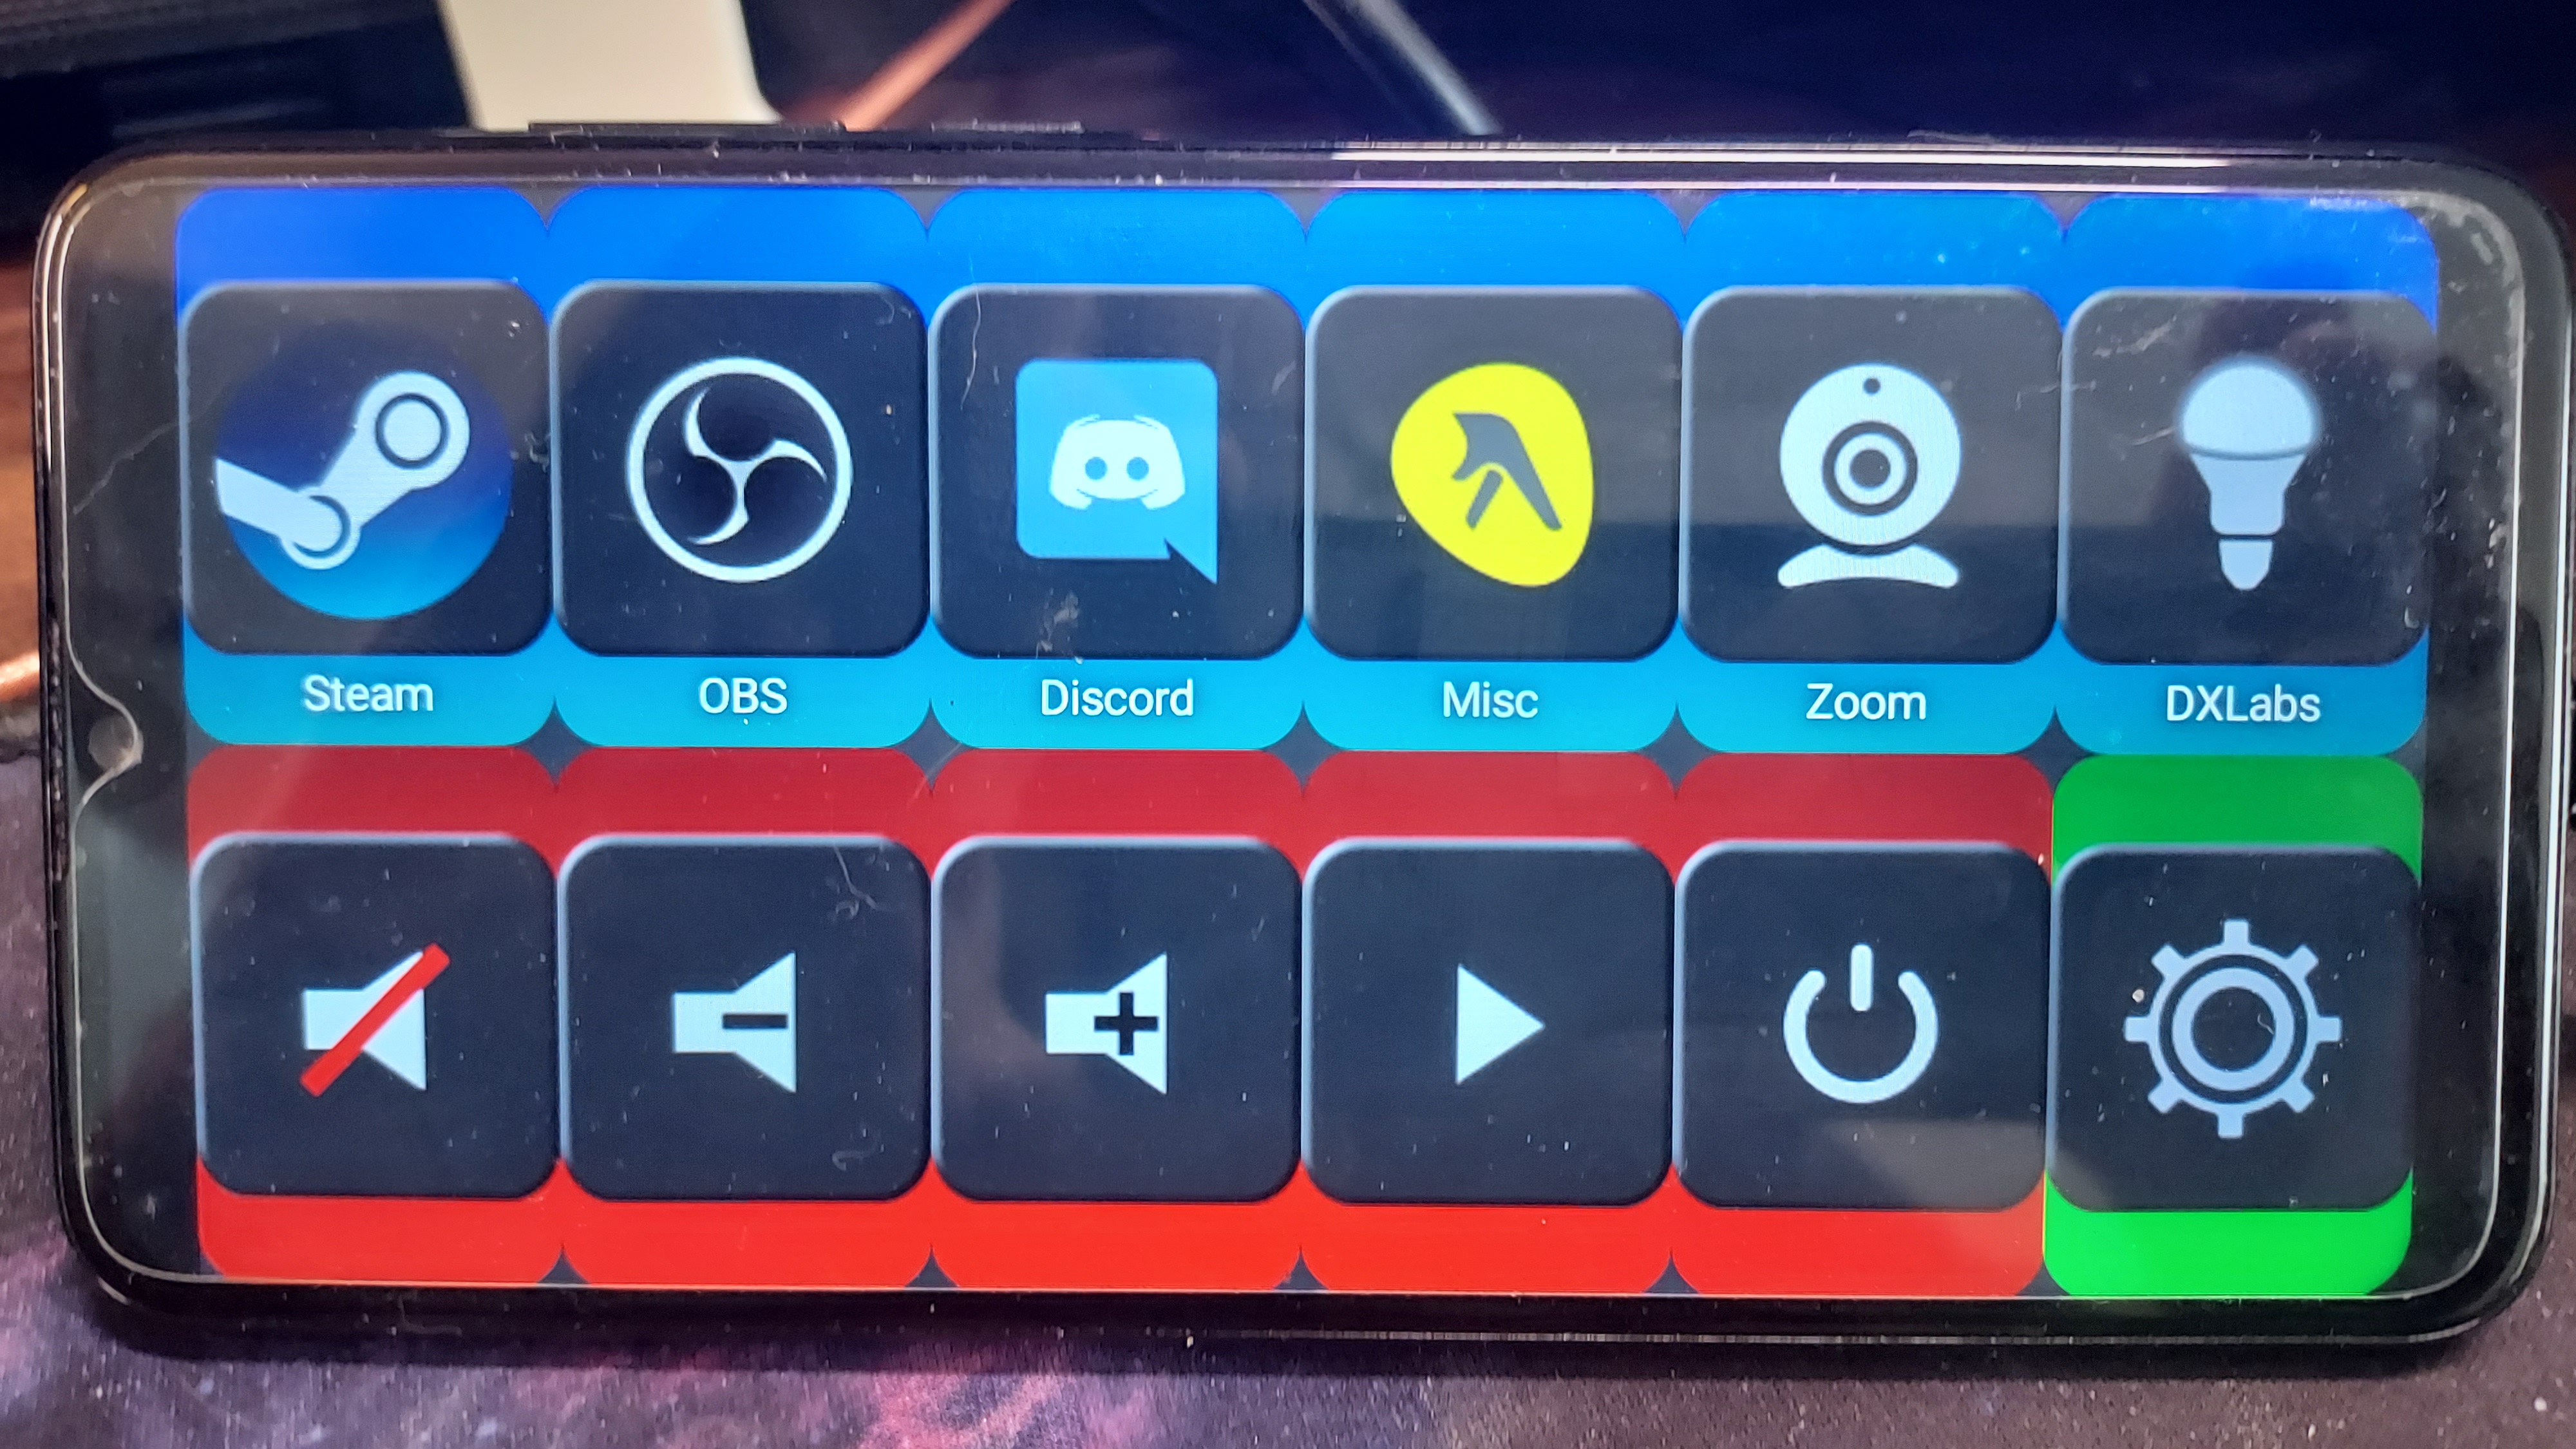
Lately I've been using Touch Portal, a software alternative to Elgato Streamdeck. It's server application that is run on the computer and buttons can be defined to do tasks, and it links to OBS, Discord and other applications. You build the interface, which then runs on a client, either Android 4.1 and up, and IOS 9.3 and up. It has plug-ins for popular apps integration. There is a Discord community where users share thier pages and get help.
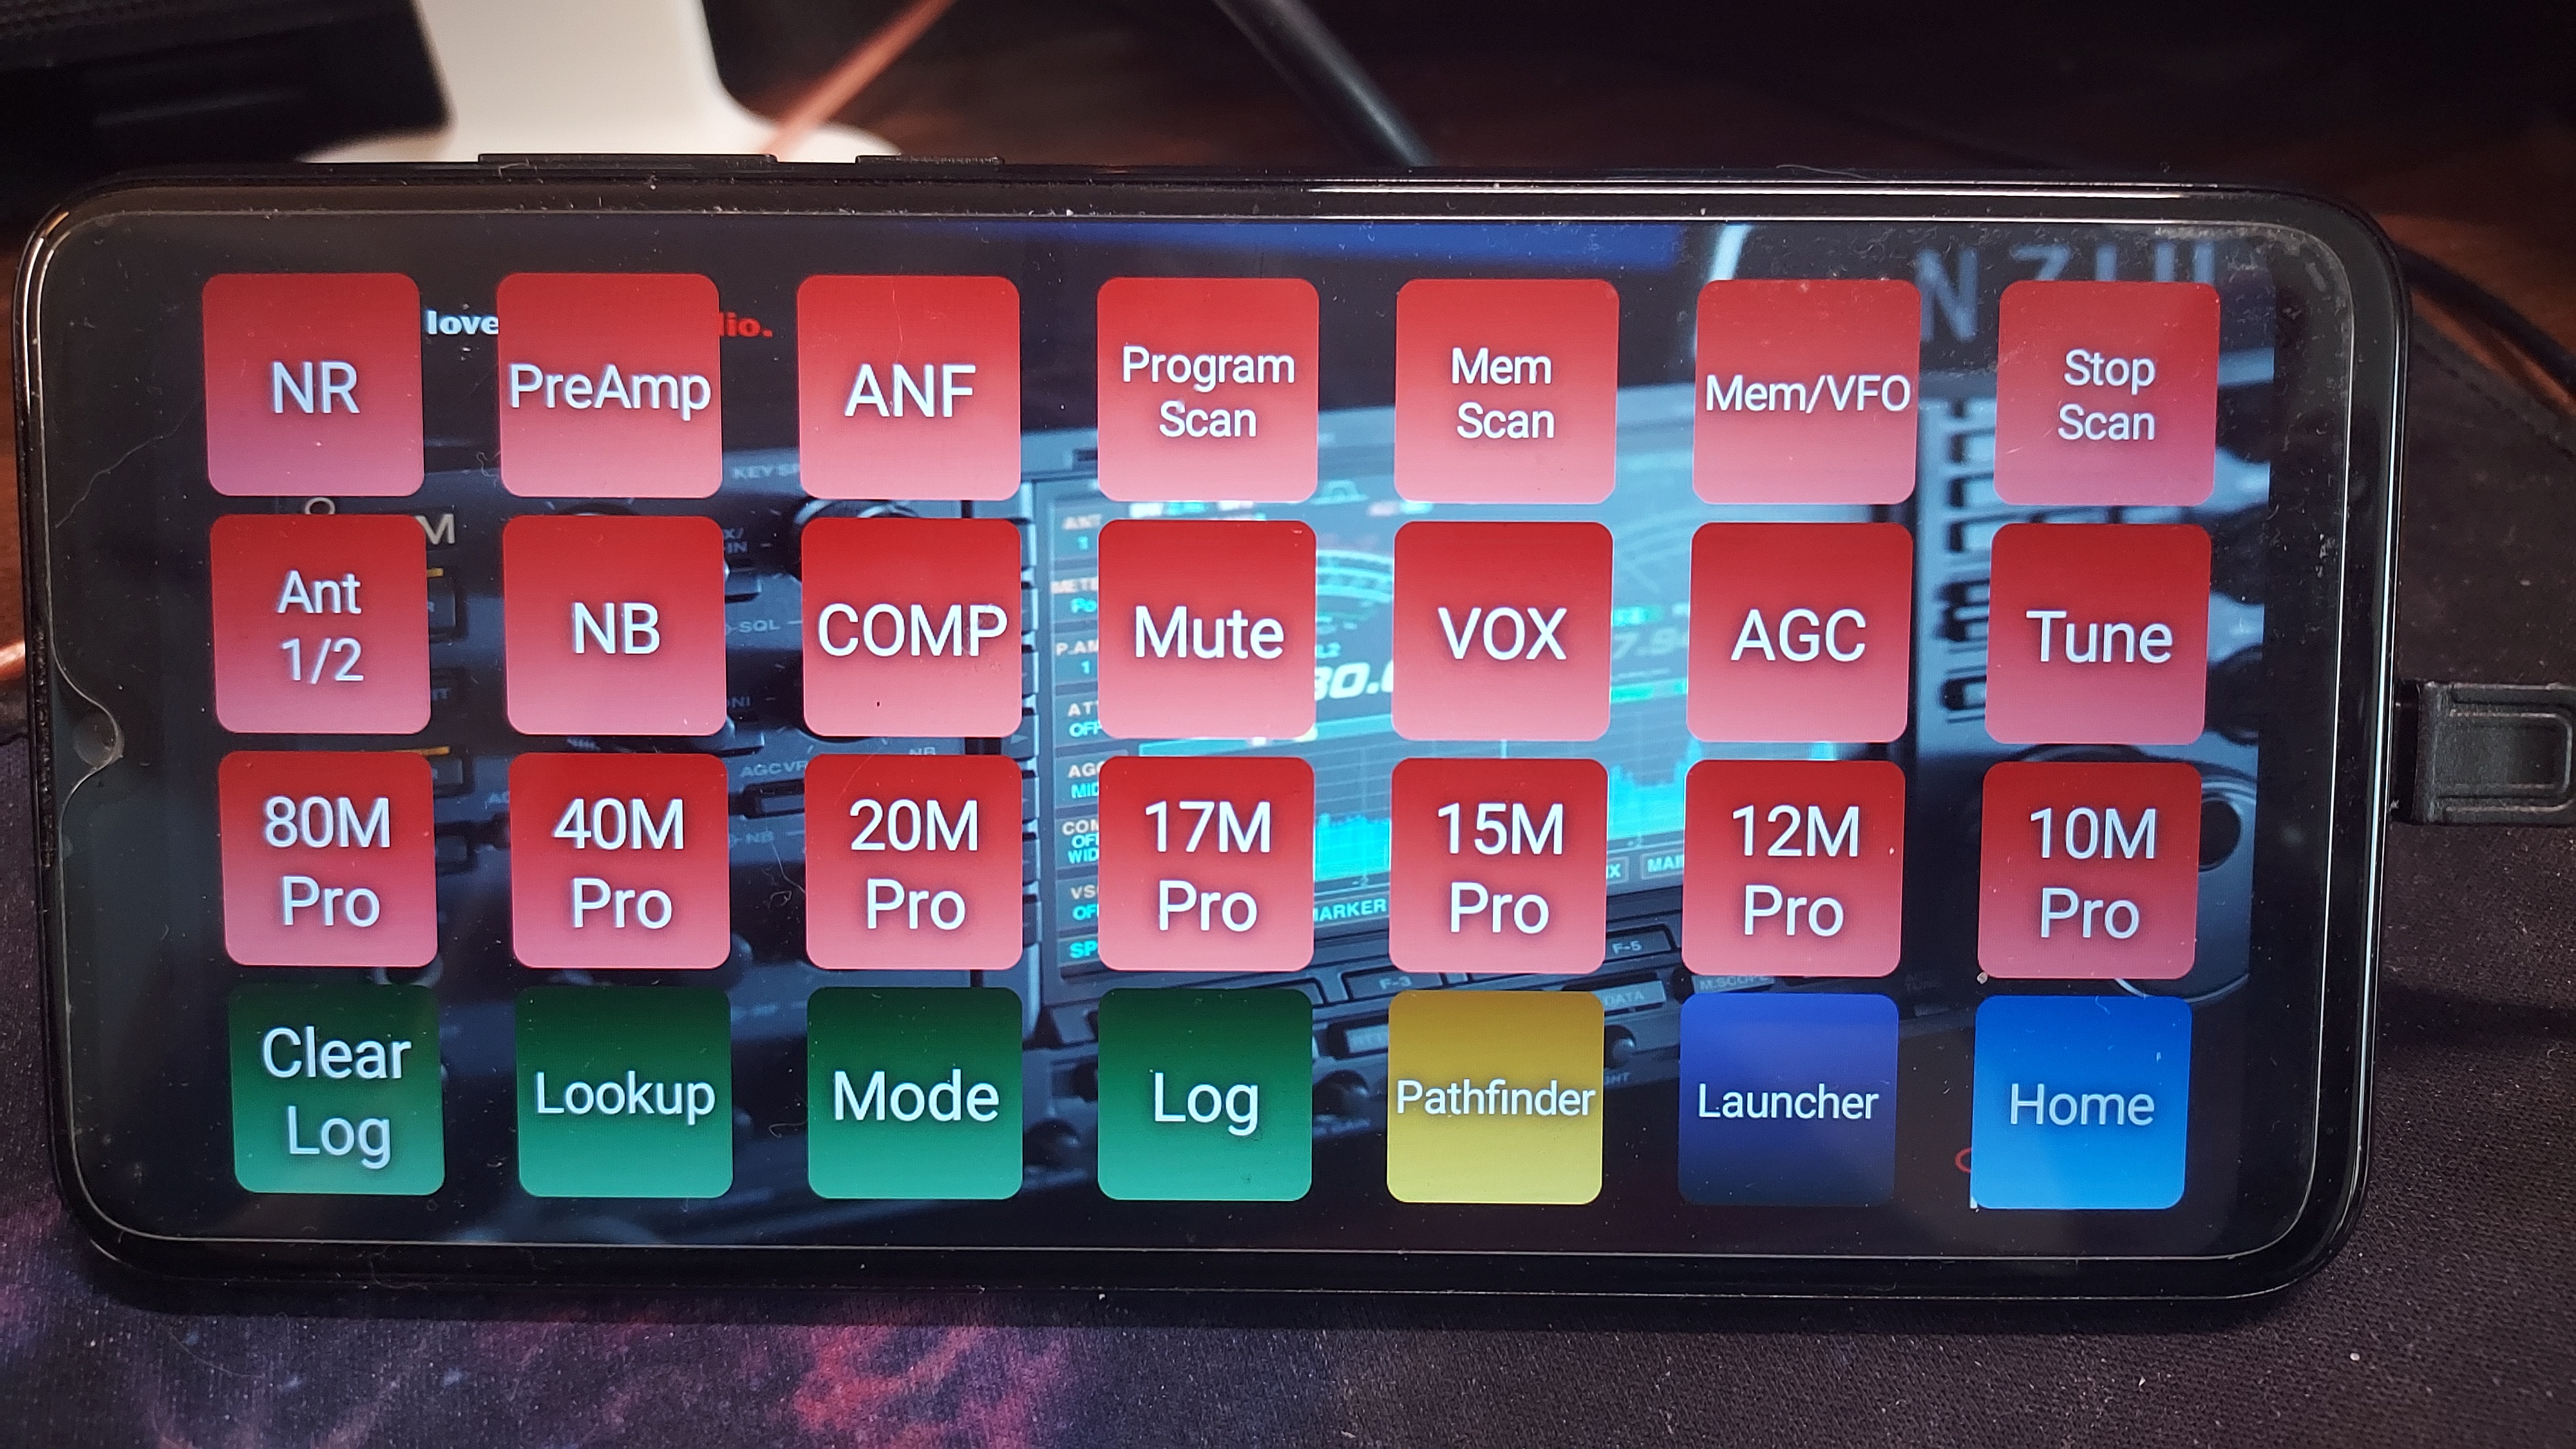
You can put use your obsolete or old devices you may have laying around. You can make multiple pages. The free version is limited to two pages and a 4x2 matrix of buttons. The paid version is inexpensive and can be used on multiple devices. I have mine setup for controlling the DXLabs Suite, sending keystrokes to Commander for rig control, as well as using buttons to log a contact. I have user-defined buttons on Commander to change the rig to a band, enter the low end and high end of that band into the radio's P1 and P2 memories so that I can then to a program scan of that band. These commands are on the Touc Portal ans a button for each band. I also have buttons to turn on/off NB, ANF AGC and Pre-Amp. I can do this all from a old Android phone I have without having to use a mouse, just push a button.
Another great option is the OBS integration. You can setup various OBS functions, like switching scenes, start and stopping recording/streaming. It can even show the output within the Touch Portal app. This is all done through the wireless network. Check it out!
Pandapter Alternative Using SDR
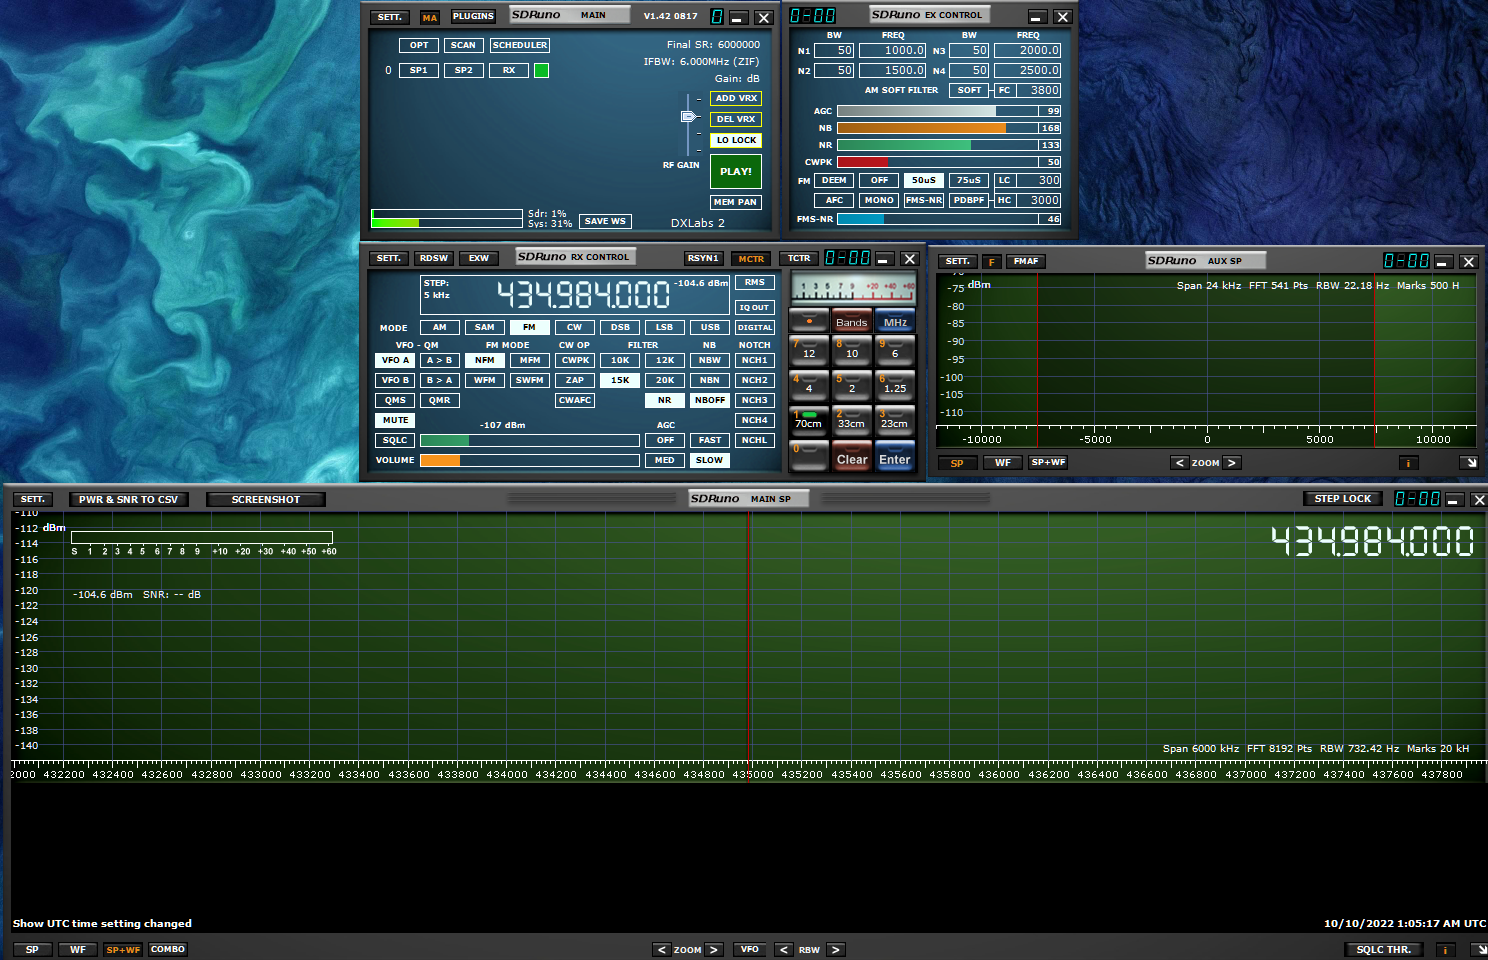
Since the Icom IC-746 doesn't have a waterfall display, I decided to add a SDR Receiver and sync it the IC-746. I added a SDR receiver and used SDRUno, and with the SDRUno I have it synced to DXLabs Commander as a secondary radio. It uses the same antenna by having a SDR TX/RX switch that I bought off of Banggood.
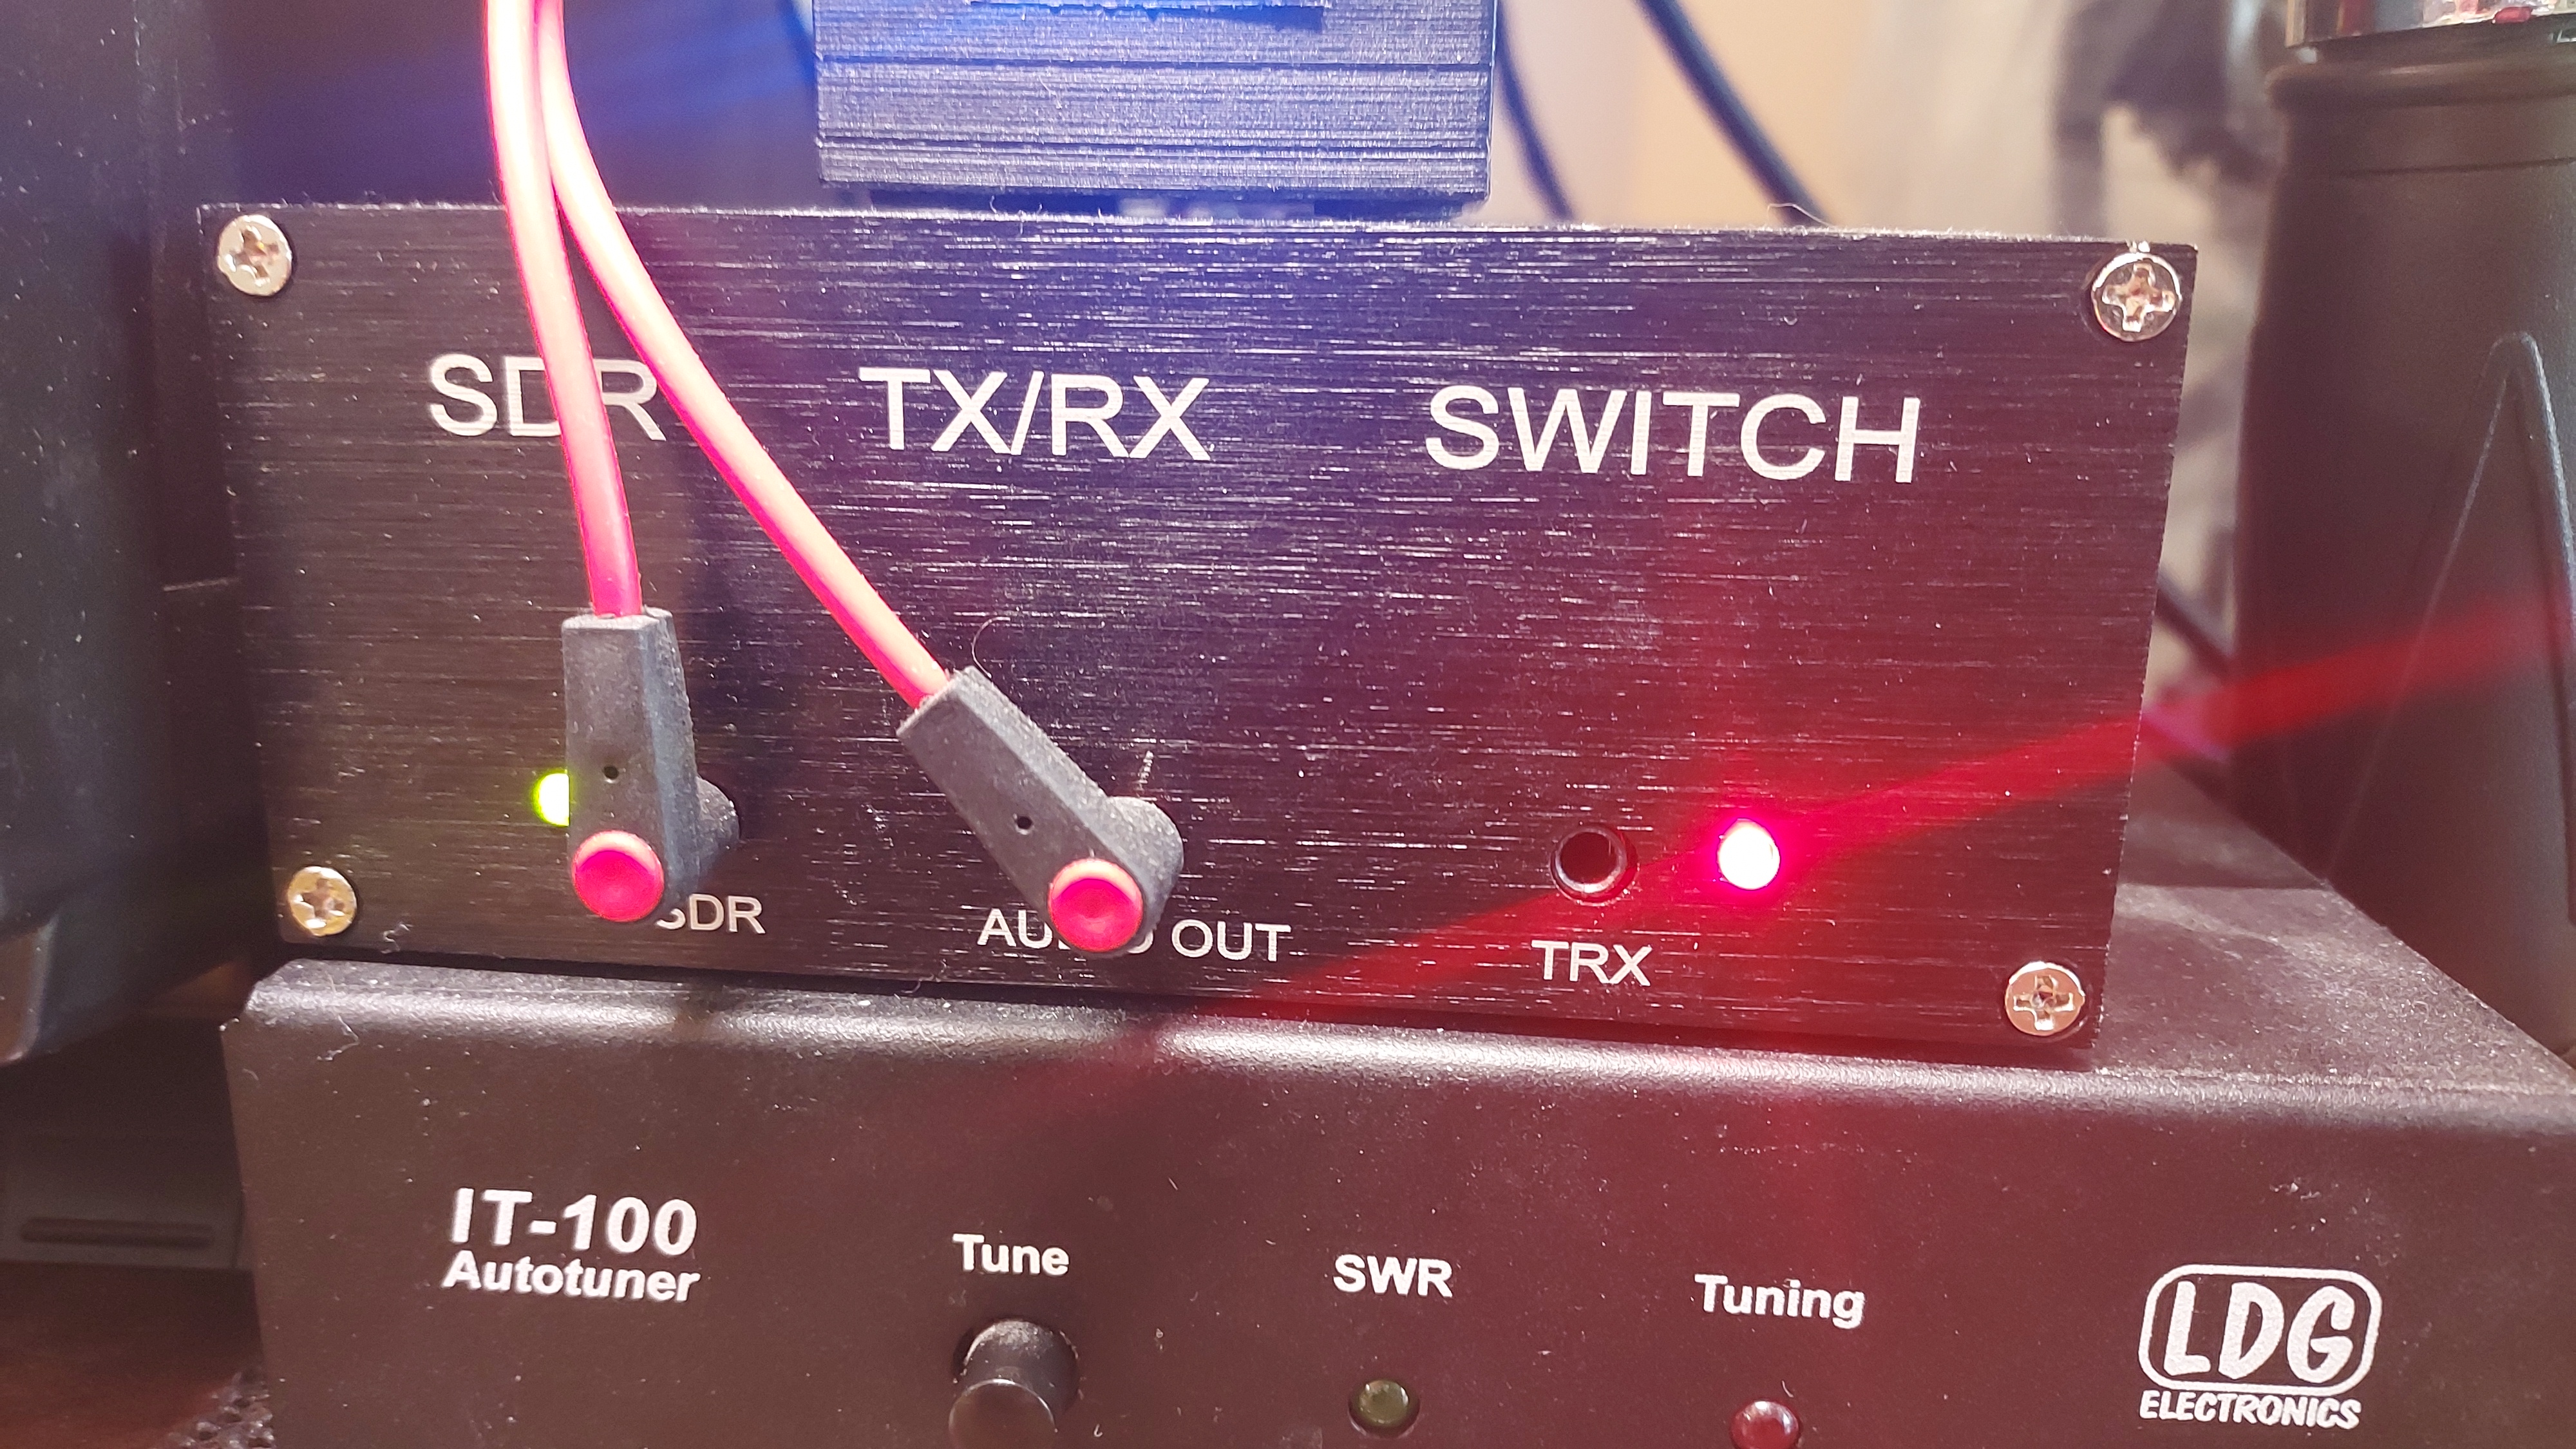
The switch is triggered by the amplifier connector on the IC-746. Since I also are running the On Air light, I added a dual relay connected to the radio so I can trigger both. I have a YouTube video showing how I set this up. Watch it at Panadapter using SDRUno SDR-RTL and Ham it Up Nano
Voltmeter
A Mini Digital DC Voltmeter 0.28 Inch Two-Wire 2.5V-30V and dual Anderson Powerpoles connectors. Case was designed in Blender.
Case size 45mm wide 35mm high 60mm deep, with a dual Anderson holder printed separately.
20meter Magnetic Loop Antenna
A home made 20 meter magnetic loop antenna with a homebrew high voltage capacitor. Since I'm in an apartment with no way to put up any type of large antenna, I decided to make this loop and place it on my balcony. Plans were taken from a 20 meter loop designed from SM0VPO, with a high voltage capacitor made from two pieces of copper clad pc boards separated by a kitchen cleaning sponge. A printed screw and round nut provides the manual adjustment. A 1:1 balun was made and placed inside a printed case. All tubes made from 3/4" pcv pipes. Instead of trying to tie wrap the cross pipes, I instead used a pvc cross pipe connector.
Pre-Assembly, finished with the wiring of the loops. Curly is doing Quality Assurance.
High voltage capacitor, two pcboards, 35mm X 30mm, separated by a kitchen sponge. A 3d printed adjustment screw and nut is used to compress/decompress the distance between the two plates. This was a trial and error, since the original size from the SM0VPO page was 60mm X 60mm, but the distance between the two plates to make this resonant was way beyond the spacing of the adjustment screw, so I had to make the capacitance smaller by making the two plates smaller. I can get the swr down to near 1.1:1 but the bandwidth is very narrow, usually around 40KHz wide before I have to readjust.
The box containing a toriod core for a 1:1 balun. The feed coax is coming out the left side of the box. It is glued and zipped tied to the horizontal pvc rod.
The antenna sitting on the balcony table. I picked up a snare drum tripod stand, the bottom half, from Goodwill and the pvc pipe slides right over it. It's not locked down on the tripod so I can rotate it around.
(Update: Since it didn't work as well as I expected, I tore the loop down)